{"@context":"https://schema.org","@type":"Article","headline":"Mold Remediation: A Step-by-Step Homeowner Guide","description":"Get a free mold remediation quote and learn the complete process, from moisture inspection and containment to safe cleanup, drying, and final checks.","image":"https://zleague-public-prod.s3.us-east-2.amazonaws.com/article_images/1ecba76b-ce93-41cf-900b-21b5bb87d3db/mold-remediation-a-homeowner-step-by-step-guide-847835.webp","keywords":"mold remediation","author":{"@type":"Person","name":"Bryan King"},"publisher":{"@type":"Organization","name":"Remtech Environmental","url":"https://remtechenvironmental.com/"},"datePublished":"2026-06-24","dateModified":"2026-06-24"}Most mold growth begins within forty-eight hours of a pipe leak or heavy rain event. Effective mold remediation fixes the water source before removing fungal growth from your home, helping prevent the problem from returning.
Get a free mold remediation quote from Remtech Environmental.
Mold remediation is a multi-step cleanup process designed to remove dangerous fungal growth and fix the underlying moisture issues that caused the problem in your home. According to the Environmental Protection Agency, technicians must find the water source and seal off the area to stop spores from spreading. Professional teams use special vacuums to remove contaminated materials while cleaning every hard surface and throwing away porous items like carpet, insulation, or drywall. Workers then dry the work area completely and replace any structural pieces that were removed to ensure the house is safe for your family. This careful approach ensures the property is fully restored and protected against future mold growth for many years to come.
Every homeowner needs to understand how this work happens to ensure the job is done the right way. To help you prepare your property and family, we have listed exactly what mold remediation includes for every standard project. The path begins with a careful inspection of the property and the source of moisture.## What mold remediation includes
In short, mold remediation identifies and stops moisture, contains the work area, removes materials that cannot be saved, cleans remaining surfaces, and verifies that the space is dry.
Mold remediation is much more than just wiping a wall clean. While simple cleaning may take away what you see, the full cleanup targets the root cause so the problem does not come back. This work involves finding where the water starts, making a safe space to work, and taking out all the growth. By using a step-by-step mold removal process, pros make sure your home stays safe and dry.
Finding the moisture source
The first and most vital part of any job is moisture control. Mold needs water to grow, so you must stop the leak or dampness first. If you only scrub the mold but do not fix the pipe or roof, the growth will return. The EPA states that moisture control is the only way to manage mold in a building. Experts look for leaks in walls, wet floors, and damp air to find what is feeding the spores.
High moisture levels can come from many places. It might be a slow drip under a sink or damp air in a crawl space. When water enters a home, mold can start to grow in just 24 to 48 hours. Quick action helps stop a small leak from being a large and costly issue. Pros use tools to find water that is hidden behind walls or under floors where you cannot see it.
Containment and safe removal
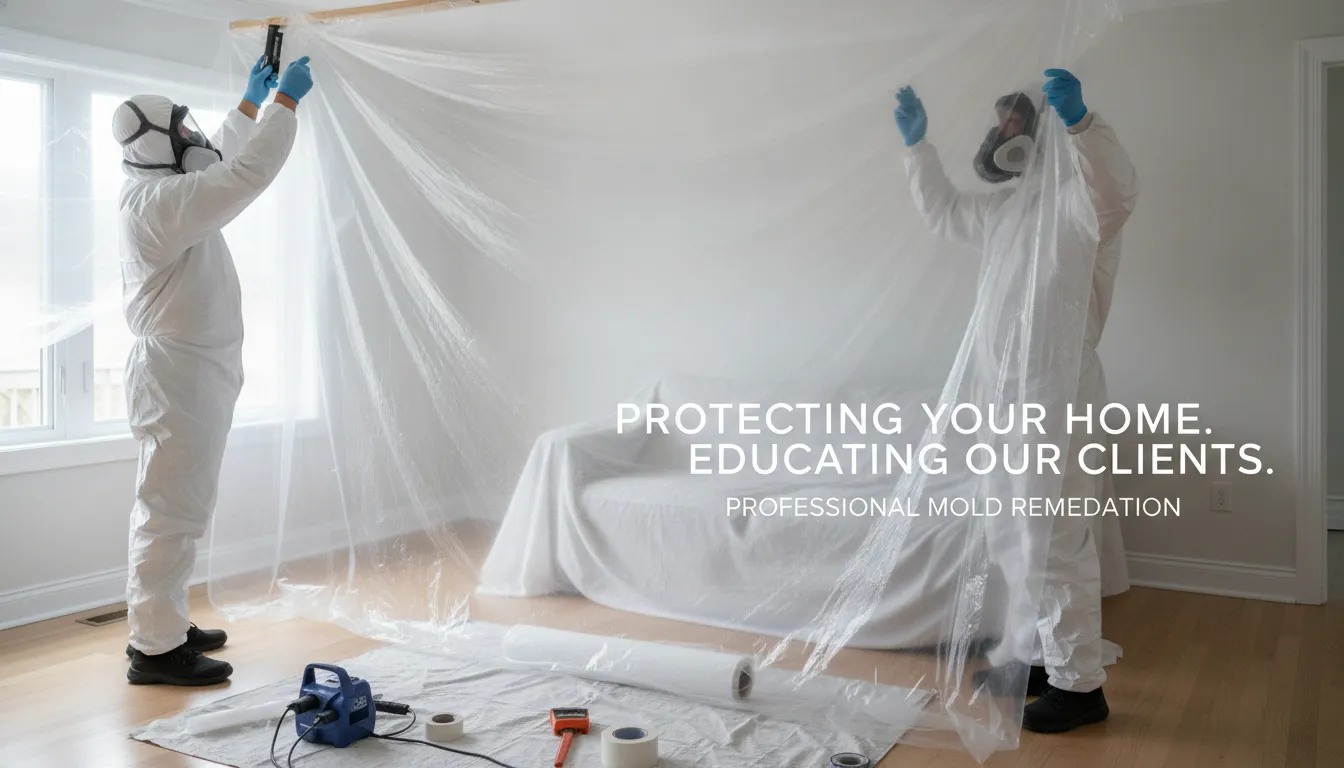
Before any mold is moved, the team must set up a safe area. They use plastic sheets and air filters to trap spores so they do not float to other rooms. This step protects the rest of your home while the team works. Workers also wear masks, gloves, and suits to keep the mold off their skin and out of their lungs. This keeps both the workers and your family safe during the cleanup.
Items that have many tiny holes often need to be thrown away. Things like carpets, foam, and ceiling tiles can trap mold deep inside. It is often too hard to get these items fully clean once they are wet. Hard things like wood and metal can usually stay. The team scrubs these hard surfaces with soap and water to clear them. They do not paint over the mold, as that will not stop it from growing again.
Cleaning and drying the area
After the team removes the mold, they must dry the area well. Wet spots can lead to new growth in just one or two days. Experts use big fans and tools that pull water from the air to speed up the process. If you have a large flood, expert water damage restoration services help dry out the frame of the house. This stops rot and keeps the air clean.
The final step is to check the area and make sure it is safe. Experts look for any spots they missed and test the air. They want to prove that the moisture is gone and the mold is no longer a threat. This gives you peace of mind that your home is a healthy place to live. Once the area is dry and clean, you can start to fix any damage and get back to your normal life.
The mold remediation process step by step
The process follows seven practical stages: assess the property, stop moisture, contain the area, control airflow, remove unsalvageable materials, clean and dry surfaces, and complete final checks.
Professional mold cleanup is a technical task that needs a clear plan. While every home in North Carolina is different, most jobs follow a set path to keep the air safe. Our step-by-step mold removal process focuses on fixing the root cause so the mold does not come back. Following EPA rules helps keep both your family and the workers safe during the project.
Inspection and assessment
The first step is a full check of the home. Experts look for visible growth and use tools to find hidden water behind walls or under floors. This helps us create a custom plan for your home. Since water control is the only way to stop mold, we must find the water source first. This could be a leaky pipe, a roof gap, or high humidity in your crawl space.
Containment and air pressure
Containment helps keep the work area separate from the rest of the home.To keep mold spores from spreading, we set up strong barriers. We use plastic sheets to seal off the work area from the rest of the house. Our team also uses air machines. These tools pull air through filters before venting it outside. This step is vital for protecting your indoor air while we work on the old materials.
- Find and fix the water source. We cannot start cleaning until the leak or water issue is gone. If water keeps coming in, the mold will grow back in a few days.
- Set up containment. We use plastic sheets to block off the area. This stops spores from moving into clean rooms through the vents or doors.
- Establish air flow. Air scrubbers run all day to catch tiny spores. This keeps the air pressure low so dusty air stays inside the work zone.
- Remove moldy items. We cut out soft items like drywall or carpet that cannot be saved. These items go into sealed bags for safe disposal.
- Clean hard surfaces. We scrub wood and metal with good cleaners. Then we dry the area fully to make sure no water is left behind.
- Detailed vacuuming. Once the area is dry, we vacuum all surfaces. This picks up the dead spores and fine dust that normal vacuums miss.
- Final check and testing. We review the work to ensure everything is clean and dry. In some cases, a third party tests the air to confirm the job is done right.
Cleaning and item disposal
Cleaning depends on the type of item. Hard surfaces like studs can often be saved by scrubbing with soap and water. But soft items like ceiling tiles or rugs often need to be thrown away. Spores can hide deep inside these items, making them hard to clean fully. We bag these items inside the work zone to stop the spread of dust.
Once we remove the mold, the drying phase begins. We use big fans and drying tools to pull every bit of dampness out of the walls. This is the most important part of water damage restoration services. Painting over a damp spot will not work and can lead to more growth later. We only finish the job when water levels are back to normal.
How the remediation plan changes by material and location
Porous materials often require removal, while many hard surfaces can be cleaned and dried. The location also determines the containment, access, and moisture-control plan.
Every mold remediation project starts with a close look at the area with mold. Mold does not grow the same way on every surface. Some items allow mold to sink deep into their pores, while others keep it on the top layer. Where the mold is found also matters. Experts must choose the right tools and methods for each spot to ensure the mold stays away.
Material types and removal methods
The build of a material is the biggest factor in the cleanup plan. Experts group items into three main types: porous, semi-porous, and nonporous to decide if an item can be saved. According to the EPA, porous items like carpet often need tossing because mold grows deep inside them. Harder surfaces are easier to clean since the mold stays on the top.
Material TypeCommon ExamplesCleaning MethodLikely OutcomePorousCarpet, drywall, insulationHEPA vacuum and removalUsually tossedSemi-PorousWood framing, concreteDeep scrub and dryingUsually savedNonporousMetal, glass, plasticWipe with soap and waterAlmost always savedSemi-porous items like wood studs can often be saved using a step-by-step mold removal process. This might involve wire brushing or sanding to reach the mold that has started to root in the wood. Once the surface is clear, the wood must be dried to low levels. This prevents new spores from growing in the same spot later on.
Managing mold in HVAC systems
Mold in your heating and cooling system is a big worry for air quality. These systems can spread spores to every room in the house, so cleaning them needs the right gear. Experts use high-power vacuums and brushes to clear out the dust and mold from the ducts. If the system has soft liners that are moldy, these parts must be replaced to stop the problem.
Addressing crawl space moisture
Crawl spaces are one of the most common places to find mold in North Carolina. These areas are often damp and dark, which is the perfect mix for mold growth. High humidity in the dirt can seep into the floor wood above. Many homeowners find that preventing mold with crawl space encapsulation is the best way to keep the air dry and clean.
Fixing the water source is the only way to stop mold for good. If you just clean the mold but leave the damp air, the spores will return in just a few days. Experts look for leaks, poor drainage, or high humidity as the root cause. By drying out the space and sealing it off, you protect both the home and the people living inside from future mold issues.
Can homeowners handle mold remediation themselves?
Homeowners may be able to clean a small, accessible area, but widespread growth, hidden moisture, contaminated HVAC components, or vulnerable occupants call for professional guidance.
Most homeowners find small spots of mold at some point. It might be in a damp corner or under a leaky sink. Small spots are easy to clean. But when the mold spreads, the job gets much harder. You must know when a scrub brush is enough and when you need a pro.
When to try it yourself
You can often handle mold if it covers a small space. The EPA says that if the area is less than ten square feet, you might do the work yourself. This is about the size of a three-foot by three-foot square. For these small jobs, you can clean hard surfaces by scrubbing with soap and water. Always dry the area well after you finish. Mold needs wet spots to grow, so stopping leaks is the best way to keep it away.
If you choose to clean it, work fast. Mold can start to grow in just 24 to 48 hours after water leaks into your home. It is best to dry things out as soon as you find a leak. Use fans and open windows to move the air. But do not just paint over the mold. Painting over it will not stop the growth. You must remove the mold and fix the water source first.
Limits of home cleanup
Cleaning mold is not just about wiping a wall. You need to stay safe. You should wear gear like gloves, masks, and goggles. This gear helps keep mold out of your eyes and nose. Safety is key because mold can cause health issues for some people. Also, never mix bleach with other cleaners like ammonia. Doing this creates toxic gas that is very dangerous to breathe.
Some items are too hard to clean at home. Stuff like carpet and ceiling tiles are porous. This means they have tiny holes where mold can hide deep inside. Often, you must throw these items away because you cannot get all the mold out. If you try to keep them, the mold might just come back. A step-by-step mold removal process helps you decide what to keep and what to toss.
Expert standards and safety
Large mold problems need a different plan. If the mold covers more than ten square feet, it is time to call for help. Big jobs often involve hidden mold behind walls or under floors. Experts have the right tools to find these hidden spots. They also use special plastic walls to keep mold spores from spreading to other rooms while they work.
In North Carolina, the state does not require a special mold-remediation license. But this does not mean just anyone can do the work. You should look for pros who follow high standards. Top teams have IICRC-certified workers and follow strict EPA rules. These experts also know how to find other risks. For example, they look for old items that might have asbestos. You can learn more about finding environmental hazards during remediation to see why this matters. Choosing a pro with the right training keeps your home and family safe.
How long does mold remediation take, and what affects cost?
Project timing and cost depend on the affected area, material types, access, contamination controls, drying needs, and repairs. Remtech evaluates each property and provides project-specific guidance rather than a flat rate.
The time and cost of a mold project depend on the specific needs of your property. Most jobs take three to seven days. But large office projects or complex home repairs may take more time. Our goal is to work fast while ensuring every step of the step-by-step mold removal process meets high safety rules. We find the source of the problem so the mold does not return.
Key factors for project duration
Several things change how long a team stays on-site. The total size of the area with mold is the main factor. Small spots in a bath take less time than a full crawl space. Access also matters. If the mold is behind a wall or under floor boards, it takes more work to reach it. Teams must set up strong zones to keep spores from spreading through your home or office.
Drying time is another big part of the plan. If you have water damage, you must dry the home within 24 to 48 hours to stop new growth. We use high-grade fans to pull damp air out of the wood. This part of the work cannot be rushed. The surfaces must be dry before we can finish the job.
What drives the total cost
We do not give flat rates because every mold issue is unique. Instead, we look at your case during a talk. One big cost driver is the type of items that have mold. Hard surfaces can often be cleaned with soap and water. But porous materials like rugs or ceiling tiles often need to be tossed and replaced. This adds to the cost of both work and goods.
The level of the water issue also impacts your bill. Fixing the leak or source of water is vital for a fix that lasts. For many North Carolina homes, preventing mold with crawl space encapsulation is the best long-term move. This step adds to the first cost but saves your home value and air quality for years. We aim for a full fix that finds the root cause.
The role of expert verification
Expert cleanup gives you peace of mind that the job was done right. We follow strict EPA and IICRC rules to ensure your safety. For large or tough jobs, it is wise to consult a specialist who can check the work. Final air tests or checks show that the area is clean and safe for you to use again. This final check is a key part of our promise to do the work the right way.
How to prepare your home for remediation
Before work starts, clear access to the affected area, plan a safe place for children and pets, protect important belongings, and ask the project lead what should remain untouched.
Preparing for a mold remediation project helps the work go faster. It also keeps your family and your items safe. You should know what to look for before the team arrives at your door. Good planning makes the job run smooth for everyone. Our team at Remtech wants you to feel ready and calm when we start.
Clear the work area
The team will need plenty of room to move. You should clear a path from the door to the area with mold. Move any chairs, tables, or small items away from the work zone. This keeps your things safe and gives the crew space for their tools. We want to work as fast as we can to fix the problem.
If you have items made of cloth or paper near the mold, you may need to toss them. According to the EPA, porous items like carpet and ceiling tiles often must be thrown away if they get moldy. If you want to keep certain things, talk to your lead expert first. They can tell you if an item is safe to clean or if you should throw it out.
Plan for access and safety
You must plan for where your pets and kids will stay during the work. Mold removal can be loud and dusty. It is best to keep them in a different part of the house. The team may set up plastic walls to stop mold spores from spreading. Do not enter the work zone until the team says it is safe. This keeps everyone in the home healthy.
Good air flow is also vital. The crew may need to open windows or use big fans. The CDC suggests using fans and dehumidifiers to remove moisture when it is safe to use power. This helps dry the area fast so mold does not grow back. Knowing our step-by-step mold removal process can help you see why these steps are needed.
Keep clear records
Talking with your team is key to a good project. Ask the crew how they will give you updates on the work. You should also take photos of the area before and after the job. This helps with insurance and gives you a record of the fix. Write down any questions you have for the crew as they work. They are there to help you feel safe in your home. By planning ahead, you can help the team finish the job on time.
What happens after mold remediation?
After remediation, the team confirms the area is clean and dry, documents the work, and explains any repairs or long-term moisture controls needed to help prevent recurrence.
Moisture checks help confirm that the affected area is ready for final repairs.Once the pros finish the work, you want to know your home is safe again. Good mold remediation means more than just a clean room. It means the root cause is gone and the air is clear. At Remtech, we help you through every step of this final stage. This helps you move back in with a calm mind. We focus on being clear and open with you. You will know just what we did and why we did it.
Fix the moisture source
The key to mold control is moisture control in your home. If a leak or damp air caused the growth, it must be fixed first. Our team checks that all pipes, roofs, and windows are tight. Without this fix, the mold will just come back. We often suggest tools like moisture meters to find damp spots. We may also talk about better air flow to keep your home dry and healthy.
Clear out debris and dry the area
After we remove the mold, the work site must be clean and dry. We scrub hard surfaces with soap and water to remove all traces of growth. Some things, like carpet or ceiling tiles, are porous and may need to be tossed. We handle these items with care to keep the rest of your home clean. We put old waste in sealed bags before moving it out. We also make sure the area is fully dry before we take down any plastic walls. You should never paint or seal over moldy spots; they must be clean and dry first. Painting over mold will not stop it from growing back.
Final checks and testing
The last step is to prove the job was done right. This often involves a post-remediation check from an outside pro. They look for dust, dirt, and any damp spots left behind. They may also test the air to see if spore counts are back to normal levels. This check is key to make sure the work area is safe for your family. It gives you a clear paper trail for your records or insurance needs. Before we leave, we make sure the space meets these goals:
- The work area is free of dust and dirt.
- All moldy items have been bagged and removed.
- The source of moisture has been found and fixed.
- The air and surfaces are fully dry.
Once we get the clear sign, we pack up our gear. We leave your home in great shape and ready for you to use. If you need help with a current mold issue, you can get a free quote from our team today.
Frequently Asked Questions
These answers cover the mold remediation questions homeowners ask most often, including prevention, paint, and deciding which belongings can be saved.
What kills mold permanently?
It is not possible to remove all mold and spores from your home. But you can control mold by fixing moisture levels. Based on the EPA, the key to mold control is moisture control. If you fix the water source and clean the current growth, you can stop mold from coming back. Without fixing the leak, mold will return no matter how well you clean.
Can you just paint over mold?
No, you should never paint or caulk over mold. Doing so does not work because it does not stop the mold from growing under the new layer. The CDC warns that you must fix the water problem and clean up all mold before you paint. If you paint over it, the paint will peel. The mold will keep spreading behind the wall, which causes more damage to your home.
Should I throw away moldy items?
Not always. Your choice depends on the type of material. Hard surfaces can often be cleaned by scrubbing with water and soap. But the EPA suggests that porous items like ceiling tiles and rugs often need to be tossed if they get moldy. Mold can grow deep inside the small spaces of these goods. This makes it hard or impossible to remove the spores completely through a simple cleaning.
How can I prevent mold from coming back?
The best way to prevent mold is to keep your home dry and let air flow well. You should try to keep indoor humidity levels below 45 percent to stop new growth. If you have a leak or flood, you must dry all wet items within 24 to 48 hours. For long-term help, crawl space encapsulation can help keep safe moisture levels under your home. This improves your indoor air quality.
{"@context":"https://schema.org","@type":"FAQPage","mainEntity":[{"@type":"Question","name":"What kills mold permanently?","acceptedAnswer":{"@type":"Answer","text":"Controlling moisture is the key to preventing mold from returning. Fix the water source, clean existing growth, and keep the area dry."}},{"@type":"Question","name":"Can you just paint over mold?","acceptedAnswer":{"@type":"Answer","text":"No. Fix the moisture problem and clean or remove affected materials before painting."}},{"@type":"Question","name":"Should I throw away moldy items?","acceptedAnswer":{"@type":"Answer","text":"It depends on the material. Many hard surfaces can be cleaned, while porous materials may need removal."}},{"@type":"Question","name":"How can I prevent mold from coming back?","acceptedAnswer":{"@type":"Answer","text":"Repair leaks, dry wet materials promptly, manage indoor humidity, and address persistent crawl space or drainage moisture."}}]}## Ready to get a free quote for your mold remediation?
Mold can spread fast and cause damage to your home if you do not act now. Waiting even a few days can make the job more hard and costly for you to fix. When you start today, you stop the spores from moving to other parts of your house. You can keep your family and your home safe from the risks of hidden mold growth. This helps you get back to a dry space as soon as you can. Our team follows a step-by-step mold removal process to make sure your air is safe to breathe.
Ready to get a free quote? Contact Remtech Environmental to get a free quote and start fixing your home today.