The visible signs of water damage on hardwood, like dark stains or warped planks, are upsetting enough. However, the most serious threat is often the one you can’t see. When water seeps beneath your floorboards, it creates a dark, damp environment that is the perfect breeding ground for mold. This hidden mold can begin to grow in as little as 24 hours, compromising your home’s air quality and posing health risks to your family long after the floor looks dry. A proper hardwood floor water damage repair is about more than just fixing the cosmetic issues; it’s about addressing the potential for hidden dangers. This guide will show you how to handle the visible damage while also explaining the critical importance of preventing mold growth.
Key Takeaways
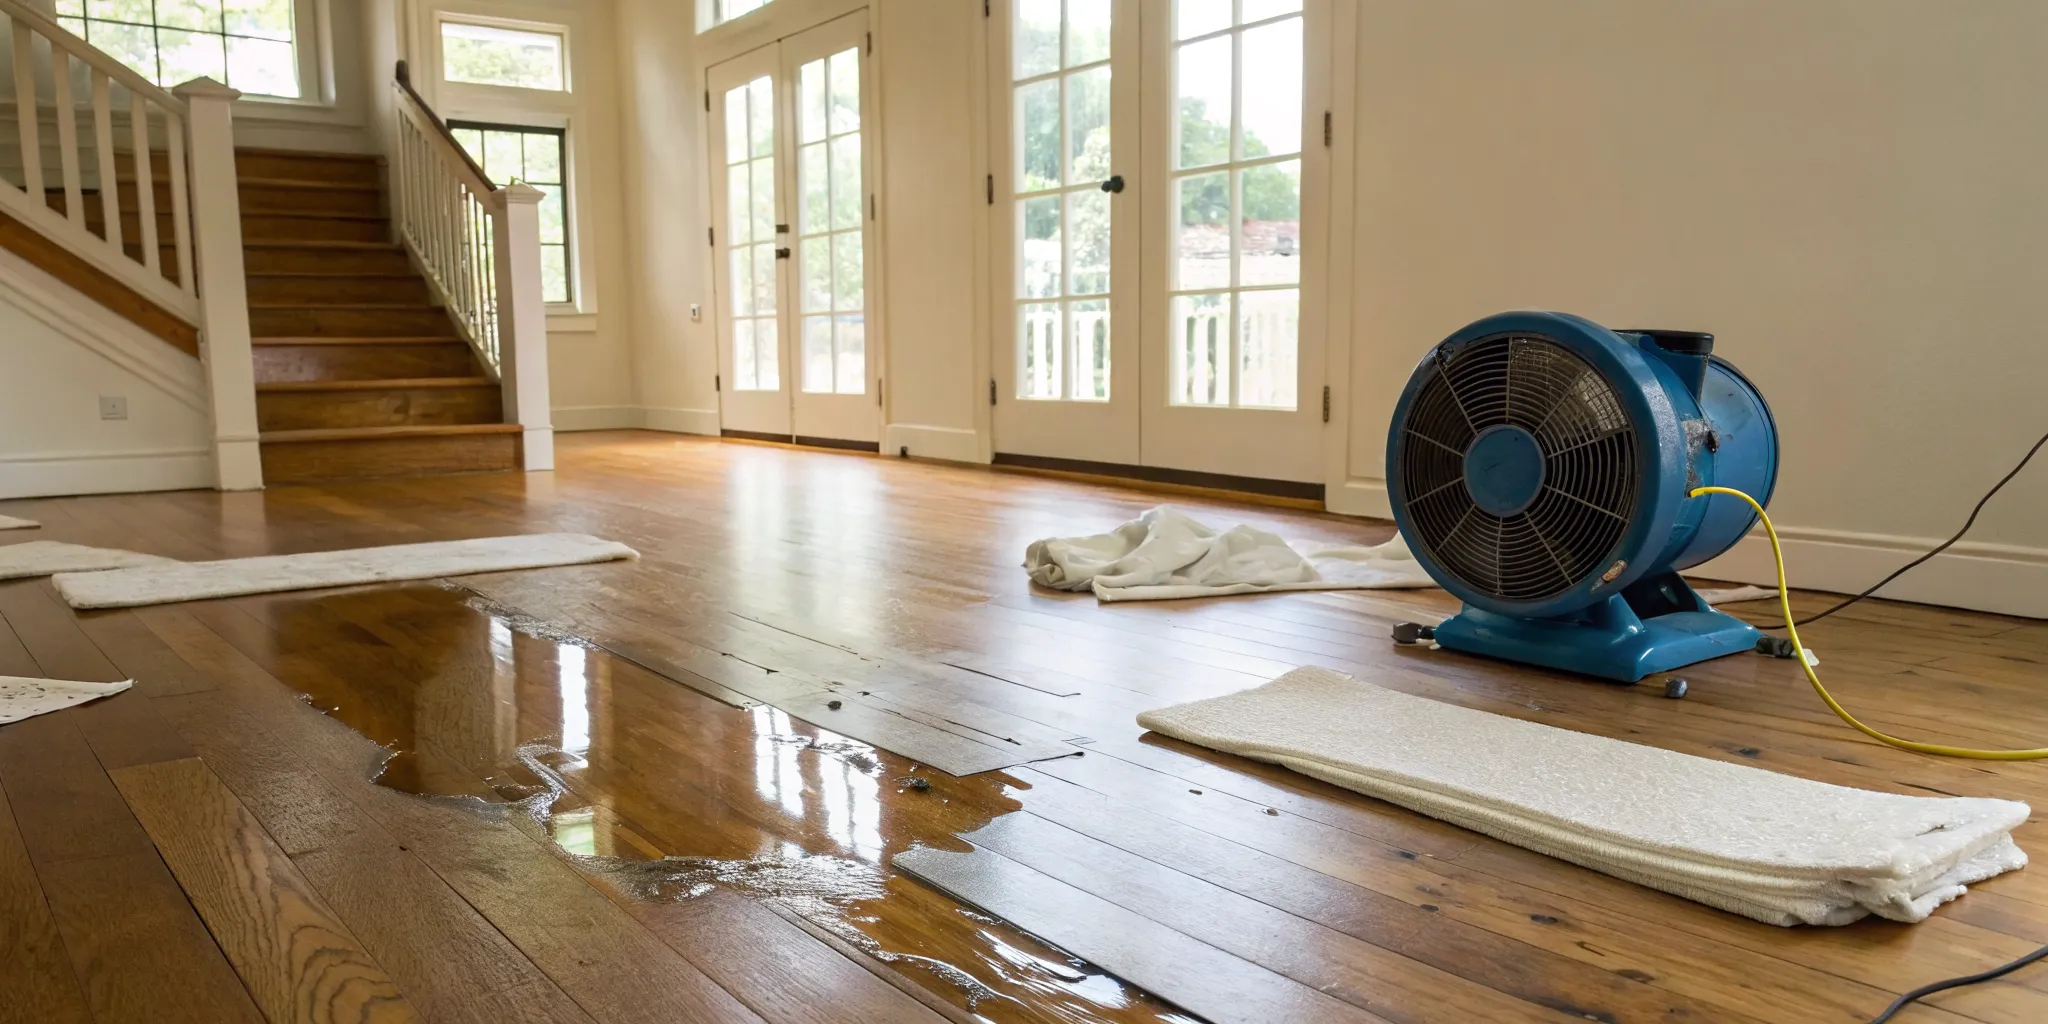
- Act Fast to Prevent Lasting Damage: Your immediate priority is to remove all standing water and get fans and dehumidifiers running. This quick response is the most important step in preventing permanent warping and stopping mold before it can start.
- Match the Repair to the Damage: After the floor is completely dry, assess the situation. Minor stains may only require sanding, but boards that are cupped, buckled, or feel soft indicate deeper damage and likely need to be replaced.
- Know When to Call a Professional: Don't hesitate to get expert help for widespread damage, soft or spongy spots, or any signs of mold. A professional can safely handle serious issues and address hidden moisture to protect your home's structure and air quality.
What Causes Water Damage on Hardwood Floors?
Beautiful hardwood floors are a huge asset to any home, but they have one major weakness: water. Damage can sneak up on you from many sources, some obvious and others surprisingly subtle. Understanding where the threat comes from is the first step in protecting your investment. From a sudden burst pipe to the slow creep of humidity, water can cause everything from minor stains to severe warping that requires a complete replacement. Knowing the potential causes helps you stay vigilant and act fast when you spot the first signs of trouble.
Leaky Pipes and Appliances
One of the most common culprits of floor damage is hiding in plain sight. Your home’s plumbing and water-using appliances, like dishwashers, refrigerators with ice makers, and washing machines, are constant risks. A slow, hidden drip from a pipe inside a wall or a small leak under the dishwasher can go unnoticed for weeks, silently saturating your subfloor and hardwood planks from below. By the time you see visible damage, the problem is often widespread. Acting quickly is key, as professional water damage restoration can be expensive, and costs rise the longer the water sits. Regular inspections of your appliances and visible pipes can save you a major headache down the road.
Floods and Storms
Major water events like flash floods, hurricane-related storm surges, or even just a severe thunderstorm can introduce a massive amount of water into your home very quickly. Solid hardwood is particularly vulnerable to this kind of saturation. When wood is submerged for an extended period, it absorbs water, causing it to swell, warp, and buckle dramatically. In these situations, the damage is rarely subtle and often affects a large area of your home. This level of water intrusion almost always requires immediate, professional intervention to extract the water and begin the drying process before the structure of the wood is permanently compromised.
Humidity and Condensation
You don’t need a flood or a leak to end up with water-damaged floors. Sometimes, the enemy is the air itself. In a humid climate like we have in North Carolina, high moisture levels in the air can be absorbed by your hardwood floors over time. This slow absorption causes the wood to expand, leading to cupping, where the edges of the planks are higher than the center. Poorly ventilated crawl spaces and basements are major contributors to this issue. This persistent dampness not only damages your floors but also creates the perfect environment for mold growth, which poses a health risk to your family.
Everyday Spills
Life happens, and so do spills. A tipped-over glass of water, a pet accident, or wet shoes on a rainy day might not seem like a big deal. However, if these small spills aren’t cleaned up immediately and thoroughly, the moisture can seep between the planks and into the wood. Over time, repeated spills in the same area can lead to dark stains, discoloration, and a breakdown of the floor’s finish. The key is to act fast. Blot any liquid immediately with a dry cloth. Never let a spill sit, as even a small amount of water can cause lasting damage if it’s given enough time to soak in.
How to Spot Water Damage on Hardwood Floors
Catching water damage early can make the difference between a simple fix and a full floor replacement. Your hardwood floors will almost always give you clues when something is wrong; you just need to know how to read the signs. From a simple dark spot to a strange smell you can’t quite place, here are the key indicators that your floors have water damage.
Stains and Discoloration
This is usually the first and most obvious sign you'll notice. Water can leave behind dark, blackish stains or even light, cloudy marks on the finish. These spots appear when moisture soaks into the wood grain. You might see these stains and find that the wood itself still feels solid to the touch, which typically points to more minor, surface-level damage. However, don't just cover it with a rug and forget about it. Discoloration is your floor’s way of telling you there’s a moisture problem that needs to be addressed before it gets worse and affects the deeper layers of the wood or the subfloor.
Cupping, Crowning, and Buckling
If the damage goes beyond simple stains, you might start to see changes in the shape of the floorboards themselves. Pay attention to how the planks are sitting. If the edges of a board are raised higher than its center, that’s called “cupping.” The opposite, where the center of the board is swollen and higher than the edges, is known as “crowning.” The most extreme version is “buckling,” where the planks lift completely away from the subfloor. These distortions happen because of an imbalance in moisture. When you see cupping, crowning, or buckling, it’s a clear sign that the affected boards will likely need to be replaced by a professional.
Soft Spots and Weakness
This is a sign of serious trouble. If you walk across your floor and feel a section that is spongy, soft, or bouncy, it means the wood has started to break down. Severe water damage can cause the wood to become swollen and weak, compromising its structural integrity. This often means the damage isn't just in the hardwood itself but has likely reached the subfloor beneath it. Soft spots are a major red flag that you should not ignore. Trying to sand or refinish a floor with this level of damage won't work; it requires a more thorough assessment and repair.
Mold and Musty Odors
Sometimes the first sign of water damage isn't something you see, but something you smell. A persistent, musty odor that you can’t air out is a classic symptom of hidden moisture and mold growth. Water can get trapped under your floorboards, creating a dark, damp environment where mold thrives. Even if your floors look perfectly fine on the surface, that smell is a warning that something is wrong underneath. Because mold can pose serious health risks, it’s critical to address it immediately. If you smell that tell-tale musty scent, it’s time to call in a professional for mold remediation to investigate.
Found Water Damage? What to Do Right Now
Okay, take a deep breath. Finding water pooling on your beautiful hardwood floors is stressful, but the key is to act quickly. The faster you respond, the better your chances of saving the wood and preventing more serious problems, like structural damage or mold. Don't panic; just focus on these immediate steps. What you do in the next few hours can make a huge difference in the final outcome and repair costs. We'll walk through exactly what you need to do, one step at a time, to get the situation under control. Your goal right now is simple: get the water out and get the air flowing.
Remove Standing Water
Your first priority is to get rid of any standing water. The longer water sits, the more your floorboards will absorb, leading to swelling and warping. Grab a wet-dry vacuum if you have one, as it's the most effective tool for this job. If not, use mops and plenty of old towels to soak up as much liquid as you can. Work quickly and be thorough, getting into corners and along baseboards. Wring out the towels and mops away from the affected area to avoid spreading the water. This initial step stops the damage from getting worse and prepares the floor for the crucial drying phase.
Dry the Area with Fans and Dehumidifiers
Once the visible water is gone, you need to address the moisture that has soaked into the wood and the surrounding air. Place several high-powered fans around the room, pointing them directly at the wet floor to promote evaporation. Add a dehumidifier to pull excess moisture out of the air, which will help the wood dry more effectively. Let the fans and dehumidifier run continuously for several days. It’s tempting to speed things up, but avoid using heat from a space heater or hair dryer. Applying direct heat can cause the wood to shrink, crack, or split, creating an even bigger problem. Patience is key here.
Assess the Damage
After a few days of drying, it's time to take a closer look at your floor. You need to figure out the extent of the damage to decide on the next steps. Minor issues might just be some light staining or discoloration on the surface, with the wood still feeling solid underfoot. More severe damage is much easier to spot. Look for boards that are swollen, bent, or pulling up from the subfloor. This is known as cupping or buckling. If you see these signs, or if the wood feels soft and spongy, it likely means a more involved repair or even replacement is necessary.
Document Everything for Insurance
Before you start any major repairs, document everything for a potential insurance claim. Use your phone to take plenty of photos and videos of the damage from various angles. Capture the source of the water if you can, the affected flooring, and any damaged furniture or belongings. This evidence will be invaluable when you speak with your insurance agent. If the damage looks severe or you’re worried about hidden moisture that could lead to mold growth, it’s time to call in the experts. A professional can provide a full assessment and help you plan the right repairs. When in doubt, it's always best to contact a professional for help.
Can You Save Water-Damaged Hardwood Floors?
Finding water on your beautiful hardwood floors can feel like a nightmare, but don't panic just yet. In many cases, you can absolutely save them. The key is acting fast and understanding what you're up against. Whether your floor can be fully restored depends on how much water was involved, how long it sat there, and the type of damage it caused. Let's walk through what makes a floor salvageable and why speed is your best friend in this situation.
What Determines if Your Floor Is Salvageable?
Before you can make a plan, you need to figure out how bad the damage is. Take a close look at the affected boards. Are you seeing light stains or minor discoloration on the surface? If the wood still feels solid underfoot, you might be dealing with minor damage that's fixable. However, if the planks are swollen, bent into a "U" shape (cupping), or pulling up from the subfloor (buckling), the damage is much more severe. This level of damage often indicates that the wood's structure is compromised, and you may need to contact a professional to determine if replacement is necessary.
Why Quick Drying Is Crucial
When it comes to water damage, time is not on your side. Your number one priority is to get the floor dry as quickly as possible. Remove any standing water with towels or a wet-dry vacuum, then get fans and dehumidifiers running to pull moisture from the wood and the air. This is critical because damp, dark spaces are the perfect breeding ground for mold, which can start growing in as little as 24 to 48 hours. Quick drying is the single most important step to prevent mold growth and stop the damage from getting worse. Remember, the floor might look worse when it's wet, so let it dry completely before deciding on your next steps.
How to Repair Your Hardwood Floor, Level by Level
Once the floor is completely dry, you can start to tackle the repairs. The right approach depends entirely on the extent of the damage. Some issues are simple cosmetic fixes, while others require more intensive work. We can break down the repair process into three levels, from minor touch-ups to replacing entire boards. Always remember to work in a well-ventilated area and wear protective gear like gloves and a mask, especially when sanding.
Level 1: Fixing Minor Stains
If you’re dealing with a small, light-colored stain or a bit of swelling, you might be in luck. For slight discoloration or roughness, you can often sand it away gently with fine-grit sandpaper. If you see white marks, that’s likely moisture trapped in the finish. Try dabbing a soft cloth with mineral spirits and lightly rubbing the spot until it disappears. For small gouges or chips, a quality wood filler can work wonders. Just overfill the spot slightly, let it harden completely, and then sand it down until it’s perfectly smooth and level with the surrounding floor. You can find more helpful information in our resource library.
Level 2: Correcting Cupping and Warping
Cupping is when the edges of your floorboards are higher than the center, creating a concave shape. This happens when the wood absorbs moisture. After you’ve addressed the water source and thoroughly dried the area, you can try to flatten the boards. Place heavy, flat objects like concrete blocks or stacks of books on the cupped sections. This process takes patience and can last several weeks, but it can help the boards settle back into place. Once they are flat, you will likely need to sand the entire floor to create a smooth, even surface before re-staining and applying a new protective finish.
Level 3: Replacing Severely Damaged Boards
Sometimes, a board is just too far gone. If the wood is cracked, buckled, or has deep, permanent stains, replacement is your best option. This is a more advanced repair that involves carefully cutting out the damaged board without harming its neighbors. After removing the old board and any nails, you’ll need to fit a new, matching board into the gap. This usually requires cutting the tongue off the replacement piece so it can slide into place. Secure the new board with wood glue and finish nails. If this sounds like a bit much, don't hesitate to contact us for a professional assessment.
Should You Refinish or Replace?
This is the big question. If your floor has widespread discoloration or warping, sanding and refinishing the entire surface is almost always necessary for a seamless repair. However, if the damage is severe, or if boards are soft, splintered, or show signs of mold, replacement is the safer bet. The most important thing is to address the underlying moisture issue first. Lingering dampness can lead to serious problems, including mold growth that can compromise your home’s air quality. Professional mold removal is critical to ensure your home is safe before you proceed with any floor repairs.
How to Replace a Damaged Floorboard
When a floorboard is severely warped, stained, or softened from water, a simple repair won’t cut it. Replacing the board is the best way to restore your floor’s integrity and appearance. While it’s a more involved project, it’s definitely achievable with the right tools and a bit of patience. If you’re facing widespread damage or the task feels too big, remember that professional help is always an option. A full water damage assessment can determine the extent of the problem and prevent future issues.
Gather Your Tools and Materials
Before you start, get all your supplies ready. This will make the process go much smoother. You’ll need a replacement floorboard (or boards), a circular saw with a sharp blade, a drill, a hammer, a pry bar, a wood chisel, and some finishing nails. You will also want wood glue for a secure fit and a shop vacuum to clean up debris as you work. For the finishing touches, have sandpaper, wood stain, and polyurethane finish on hand to blend the new board with your existing floor.
Remove the Damaged Board
This step requires a steady hand. Start by setting your circular saw blade to the thickness of your flooring to avoid cutting the subfloor. Make two parallel cuts down the length of the damaged board, staying about three-quarters of an inch from the edges. Next, use your chisel and hammer to carefully break up and pry out the center piece. Once it’s gone, you can pull the remaining side pieces inward and lift them out. After removing the old board and any leftover nails, inspect the subfloor for any signs of moisture or mold growth, which should be addressed immediately.
Match the New Board to Your Floor
For a seamless repair, your new board needs to be a close match. If you have extra boards from the original installation, you’re in luck. If not, take a piece of the damaged board to a flooring specialist to find a match for the wood species, color, and grain pattern. Keep in mind that older floors change color over time from sunlight and wear, so a perfect match might be tricky. The goal is to get as close as possible. You can always adjust the color later with a custom stain.
Install, Sand, and Finish the New Board
To fit the new board, you’ll likely need to trim off the bottom of the groove on one side. This allows it to slide into place over the tongue of the neighboring board. Apply a bit of wood glue to the tongue and groove of the adjacent boards before carefully tapping the new one into place with a hammer and a scrap piece of wood to protect it. Secure the board by drilling pilot holes and using finishing nails. Finally, sand the new board smooth and apply stain and a top coat to blend it perfectly with the rest of your floor.
The Hidden Risk of Water Damage: Mold Growth
When you’re dealing with a water-damaged hardwood floor, your first thought is probably about saving the wood itself. But there’s a more serious, hidden risk that can affect your home and your health: mold. If your floor stays wet for too long, there's a very good chance that mold could begin to grow underneath it. Hardwood floors aren't waterproof, and when they get soaked, moisture gets trapped in the dark, unventilated space between the planks and the subfloor. This creates the perfect environment for mold to thrive, often completely out of sight.
Even if you manage to dry the surface, the lingering dampness below can kickstart a colony. This isn't just a cosmetic issue; mold releases spores into the air that can cause allergic reactions, respiratory problems, and other health concerns. It can also continue to eat away at the structure of your subfloor, causing even more damage over time. That’s why addressing the potential for mold growth is just as critical as repairing the visible water damage to your beautiful hardwood floors. Ignoring it can lead to much bigger problems down the road.
How Fast Can Mold Grow?
It’s alarming how quickly mold can appear. In the right conditions, mold can start to grow on wet surfaces within just 24 to 48 hours. This incredibly short timeline is why immediate action is so important after any water incident. You’re truly in a race against the clock. While you might be focused on sopping up puddles and setting up fans, moisture could already be saturating the wood and subfloor, giving mold the head start it needs. By the time you notice a musty smell, a significant colony may have already formed beneath your feet.
Why You Need Professional Mold Remediation
If you see or smell mold, your first instinct might be to try and clean it yourself with a household cleaner. Please don't. DIY mold removal is often ineffective and can even make the problem worse by disturbing the colony and spreading spores throughout your home. For safe and complete removal, you really need a professional. Certified remediation specialists have the training and equipment to properly contain the affected area, remove the mold without cross-contamination, and address the underlying moisture source. We can ensure that all traces of mold, both visible and hidden, are gone for good, protecting your property and your family’s health. If you suspect you have a problem, it's always best to contact a professional for an assessment.
How to Prevent Future Water Damage
After you’ve gone through the effort of repairing your hardwood floors, the last thing you want is a repeat performance. Taking a few proactive steps can protect your investment and give you peace of mind. Prevention is all about addressing the root causes of water damage and creating a safer environment for your beautiful floors. By making a few adjustments to your home maintenance routine, you can significantly reduce the risk of future problems.
Fix Leaks Immediately
The most crucial step in preventing future issues is to fix what caused the problem in the first place. If a leaky pipe or a faulty appliance was the culprit, address it immediately. It’s a good practice to periodically inspect the plumbing under your sinks, behind your refrigerator, and around your washing machine. Even a tiny, slow drip can saturate your subfloor and cause extensive damage over time. If you suspect a hidden leak but can't find the source, it's wise to contact a professional for an inspection before it leads to another costly repair.
Control Your Home's Humidity
Wood is a natural material that reacts to its environment, and here in North Carolina, humidity is a constant battle. High humidity can cause wood floors to absorb moisture from the air, leading to swelling, cupping, and crowning. To protect your floors, aim to keep your home’s indoor humidity between 30% and 50%. You can achieve this by running your air conditioner or using dehumidifiers, especially in naturally damp areas like basements. Proper ventilation in kitchens and bathrooms is also key to preventing moisture buildup that can lead to mold growth and damage your floors from above.
Use Protective Sealants
Think of your floor’s finish as its raincoat. A quality polyurethane sealant creates a protective barrier that repels water, giving you precious time to clean up spills before they can soak into the wood. After a repair, ensuring the new finish matches and properly seals the wood is essential. Over time, this protective layer can wear down in high-traffic areas. Check your floors every few years and consider applying a fresh coat of sealant to maintain their resistance to moisture and daily wear. This simple maintenance step can save you from much bigger headaches down the road.
Use Rugs and Moisture Barriers
A few well-placed rugs can do wonders for protecting your hardwood floors. Place mats or area rugs in high-risk zones where spills and moisture are common. This includes in front of the kitchen sink and dishwasher, at all entryways to catch water from wet shoes, and in bathrooms adjacent to hardwood. Look for rugs with a waterproof backing to provide an extra layer of protection. It’s a simple and stylish way to shield the most vulnerable spots of your floor from everyday drips and splashes, keeping the wood underneath safe and dry.
Keep Extra Floorboards on Hand
When you first install or replace your hardwood floors, it’s a brilliant idea to buy an extra box of flooring. Styles and finishes can be discontinued, and even if the same wood is available years later, the new batch may not be a perfect color match to your existing floor. Having extra boards on hand ensures you have a perfect match for any future repairs. Just be sure to store the extra planks in a dry, climate-controlled area of your home, like a closet, so they remain flat and ready to use if you ever need them.
When to Call a Professional
While tackling a home repair project yourself can be incredibly satisfying, it’s also important to know your limits. When it comes to water damage, what looks like a simple fix on the surface can often be a sign of a much bigger problem. Pushing forward with a DIY repair in certain situations can lead to more damage, higher costs, and even health risks. Sometimes, the smartest and most cost-effective move is to call for backup. If you find yourself in any of the following scenarios, it’s time to put down the tools and contact a professional.
The Damage Is Widespread or Severe
If the water damage extends across a large portion of your floor or affects multiple rooms, it’s a job for the pros. Widespread damage, significant buckling, or boards that feel soft and spongy are indicators that the water has likely saturated not just the hardwood but also the subfloor beneath. A professional has the industrial-grade equipment needed to thoroughly dry deep-seated moisture and assess the structural integrity of your floor system. For severe damage, it's always best to get an expert opinion before you start pulling up boards.
You Suspect or See Mold Growth
This is a non-negotiable. If you see visible mold or notice a persistent musty odor, stop your repair efforts immediately. Mold can begin to grow within 24 to 48 hours of water exposure, and it often hides in dark, damp places like the underside of floorboards and in the subfloor. Attempting to remove it yourself without proper containment can release millions of spores into the air, contaminating other areas of your home and posing a serious health risk. A certified team can provide professional mold removal safely and effectively, ensuring your home’s air quality is restored.
The Repair Feels Beyond Your Skill Level
There’s no shame in admitting a project is too complex. Replacing a single board might be manageable, but what if several are damaged? Matching the stain and finish of a new board to an existing, aged floor is an art form that can be tricky to master. If the boards are severely warped, cracked, or permanently discolored, they will likely need replacement, which can be a difficult job. If you feel uncertain or in over your head, it’s wise to contact a professional. A botched repair can easily cause more damage, turning a moderate expense into a major one.
Related Articles
- Flood Damage Repair, Raleigh, NC | Remtech Environmental
- 3 Ways to Prevent Mold Damage | Remtech Environmental
- Flood Damage Repair, Cary, NC | Remtech Environmental
- Common Household Problems That Can Lead to Mold Damage | Remtech Environmental
- Flood Damage Repair, Asheville, NC | Remtech Environmental
Frequently Asked Questions
How long does it take for a hardwood floor to dry completely? There isn't a single magic number, as the drying time depends on the amount of water and how deeply it soaked in. While the surface might feel dry in a few days, the moisture trapped in the subfloor and the core of the wood can take much longer to evaporate. Rushing this process is a mistake. The only way to be certain the floor is thoroughly dry is by using professional moisture meters that can detect dampness deep within the wood.
My floor looks dry, but it still smells musty. What does that mean? That musty, earthy smell is a major red flag for hidden mold growth. Even if your floors appear perfectly fine on the surface, moisture can get trapped between the planks and the subfloor, creating a perfect breeding ground for mold. The odor is your first warning sign that a colony may be forming out of sight. You should take this very seriously and have a professional investigate for mold, as it can affect your home's air quality and structure.
Can I just sand down a warped or cupped board to make it flat? Sanding a warped board is usually not a good solution. Cupping is caused by a moisture imbalance, where the bottom of the board is wetter than the top. If you sand the high edges down, you are just making the board thinner in those spots without fixing the underlying moisture problem. The board will likely remain unstable, and you could end up with a new set of problems. The first step should always be to resolve the moisture issue and let the wood acclimate.
Is it okay to use a space heater to speed up the drying process? Please avoid using direct heat from a space heater or hair dryer on your wet floors. While it seems like a good way to speed things up, applying intense heat can shock the wood. This causes it to dry unevenly and too quickly, which can lead to permanent damage like cracking, splitting, and shrinking. The best method is to use fans for air circulation and a dehumidifier to gently pull moisture from the wood and the air.
I cleaned up a spill immediately, but a dark stain still appeared. Why did this happen? This is a common and frustrating situation. Wood is porous, and even if you wipe up a spill in seconds, liquid can quickly seep into the tiny spaces between planks or penetrate a worn finish. A dark stain indicates that the moisture soaked into the wood fibers themselves before you could get to it. This is why maintaining a strong, water-resistant top coat on your floors is so important, as it acts as a barrier and buys you more time to clean up messes.